Inky Goodness

Welcome! Thanks for stopping by and indulging my random thoughts on crafting and all things inky and messy. Nothing makes me happier than inky fingers and paint under my fingernails at the end of the day. A little glitter never hurts either. ;) Happy crafting!

Saturday, December 17, 2011

Pinks and Yellows

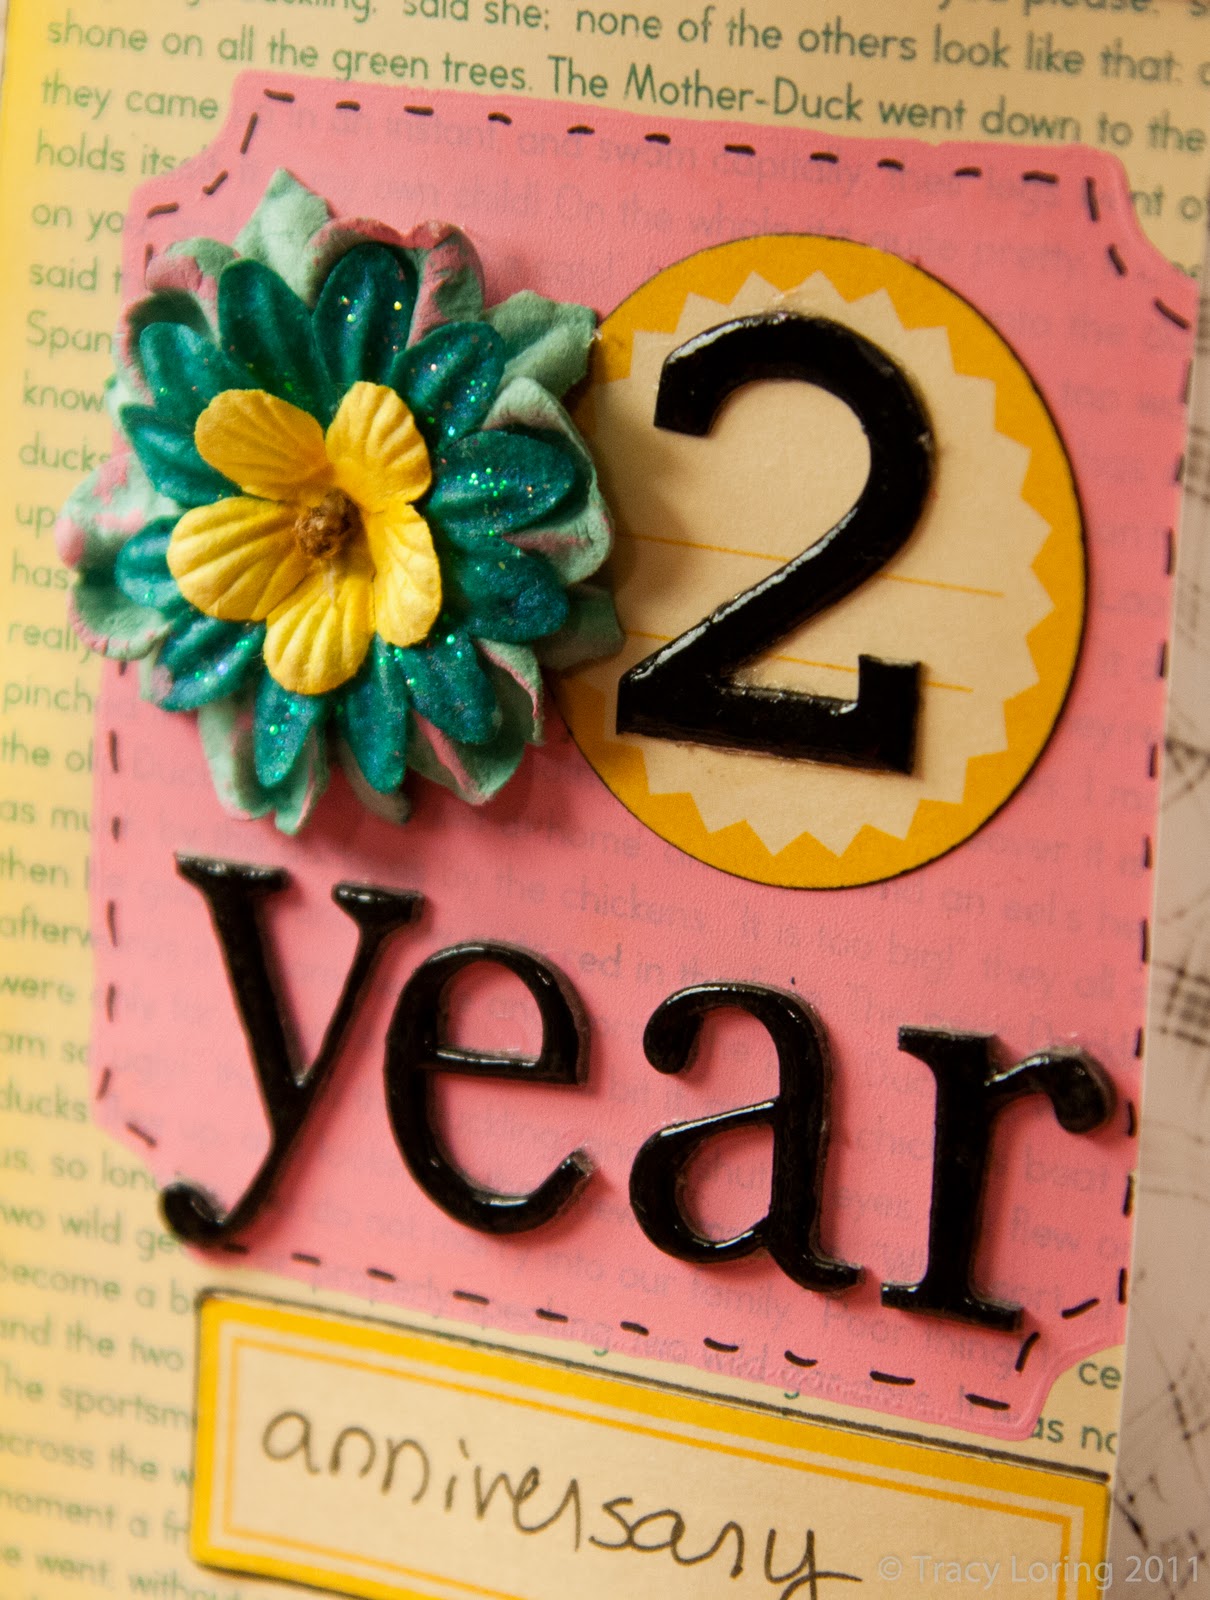
Maybe it's because it's late fall going into winter and I'm missing the brightness of spring, but I'm really into pinks, reds, and yellows right now.  The Sidewalks line from October Afternoon seemed the perfect fit for a layout of our 2 year anniversary photo shoot - bright, fun, cheerful, and happy.  I love buying supplies within a product line.  It makes putting things together a snap!

Pink, red, and yellow goodness
However, just because I used products from a line didn't mean I couldn't still get painty and inky!  I broke out some pink acrylic paint, and stamped a solid shape for the title.  I dressed up chipboard letters and numbers with black ink and some Glossy Accents for a shiny feel to go with the black and white photos. Some swishes of dry brushed pink paint along the yellow panel on the right helped to tie everything together.


Layered flowers with pink acrylic paint and some Glimmer Glam helped to sparkle up the accents.


It's nice to be back in the creative swing of things.

Happy holidays, and happy crafting!!

Supplies used in this project:
  • Sidewalks paper, label stickers, and keypad letter stickers (October Afternoon)
  • Paper flowers (Prima)
  • Pink acrylic paint (Americana)
  • Black ink (StazOn)
  • Mustard Yellow Distress Ink (Ranger)
  • Glimmer Glaze (Tidepool)
  • Border paper punch (Fiskars)
  • Solid shape stamp (Jenni Bowlin)
  • Glossy Accents (Ranger)
  • Black pen (Faber Castel)
  • Button (Making Memories)

Sunday, December 11, 2011

O Christmas Tree

I've had a few wire frame forms for a while now just waiting for the perfect time and inspiration to decorate.  No time like the holidays to get you into the crafty spirit!

I took a very simple approach and I'm loving the results!  I just punched and cut circles from double sided paper, wrapped them around a paint brush to give them a bit of curl, glued them in overlapping layers and added a bit of jute trim for contrast along the way.  Super easy and super simple!

1/3 of the way done

The finished tree.  I graduated the size of the circles as I went up the tree.

Curly goodness
I think this little guy will live on my desk at work.  Its fun cheerful colors will be a happy sight during the day.

May your holidays be filled with cheer, joy, and crafty goodness!


Supplies used in this project
  • Holly Jolly double sided paper (Cosmo Cricket)
  • Jute trim (Precious Memories Our Designer (http://www.ourdesigner.com/)
  • 1.5 and .5 inch Circle punches (Marvy)
  • Circle cutter (Fiskars)
  • Glue gun
  • Paper flowers (Prima)
  • Wire tree frame (The Shoppe at Somerset)