
 |
| Leonardo Da Vinci was right: The Smallest Feline is a Masterpiece |
My usual creative process usually goes like this:
- Select a photo(s)
- Choose a color scheme
- Pick a background
- Add a title
- Add embellishments
I prefer to use canvas or a canvas pad for acrylics when I paint, especially with heavy body acrylics. Watercolor paper and cardstock don't seem to hold up as well and they curl quite a bit. I also really like the texture of canvas and it lends itself to dry brushing as you've seen in some of my other posts.
 |
| Acrylics on canvas paper with a dry brushed coat of Glimmer Glam |
I used 2 shades of purple and a red to create the background thinning the paint with a bit of water as needed. I added some white in the center to help lighten it and begin to create a focal point. I like to keep my edges darker. To help blend the colors together, I prefer to use my favorite tool:
 |
| Painty goodness |
For layer 2, I added a floral vine stamp around the edges and a text stamp using black ink. I then did another layer of glam over the top once the ink was dry. For the photo frame, I painted fiber paste onto the background with, you guessed it, my finger. I love the texture of the fiber paste! Once the paste was dry I applied some silver glimmer mist with a paint brush. Once that dried, I lightly went over it with a black marker letting the marker skip a bit over the texture. I then added a bit of Glimmer Glaze in a teal shade to give it some color. I mounted my photo with dimensional adhesive dots to help it stand out from the background.
 |
| Fiber paste photo frame, aluminum and H2O color paper title |
For the flowers I die cut crinoline and painted them with various shades of Glimmer Mist. I love using crinoline for these types of flowers! Crinoline is the stiff fabric often used in slips under hoops skirts. It's flexible but stiff enough to hold it's shape nicely and it takes color very well.
 |
| Painted flowers waiting to dry. |
 |
| Crinoline flowers. You can also see the texture from the fiber paste photo frame and the chunks of glitter from the Glimmer Glam on the background in this shot. |
For the finishing touch I added another crinoline flower and chipboard flourishes to the corner of the photo. I stamped and used a black marker on the flourishes and then painted them with silver ink and teal Glimmer Glaze. Glaze is more dimensional and opaque than Glam. It's also shimmery and does not have the chunks of glitter that Glam does. I love to use all of these coloring media together. More painty goodness. :)
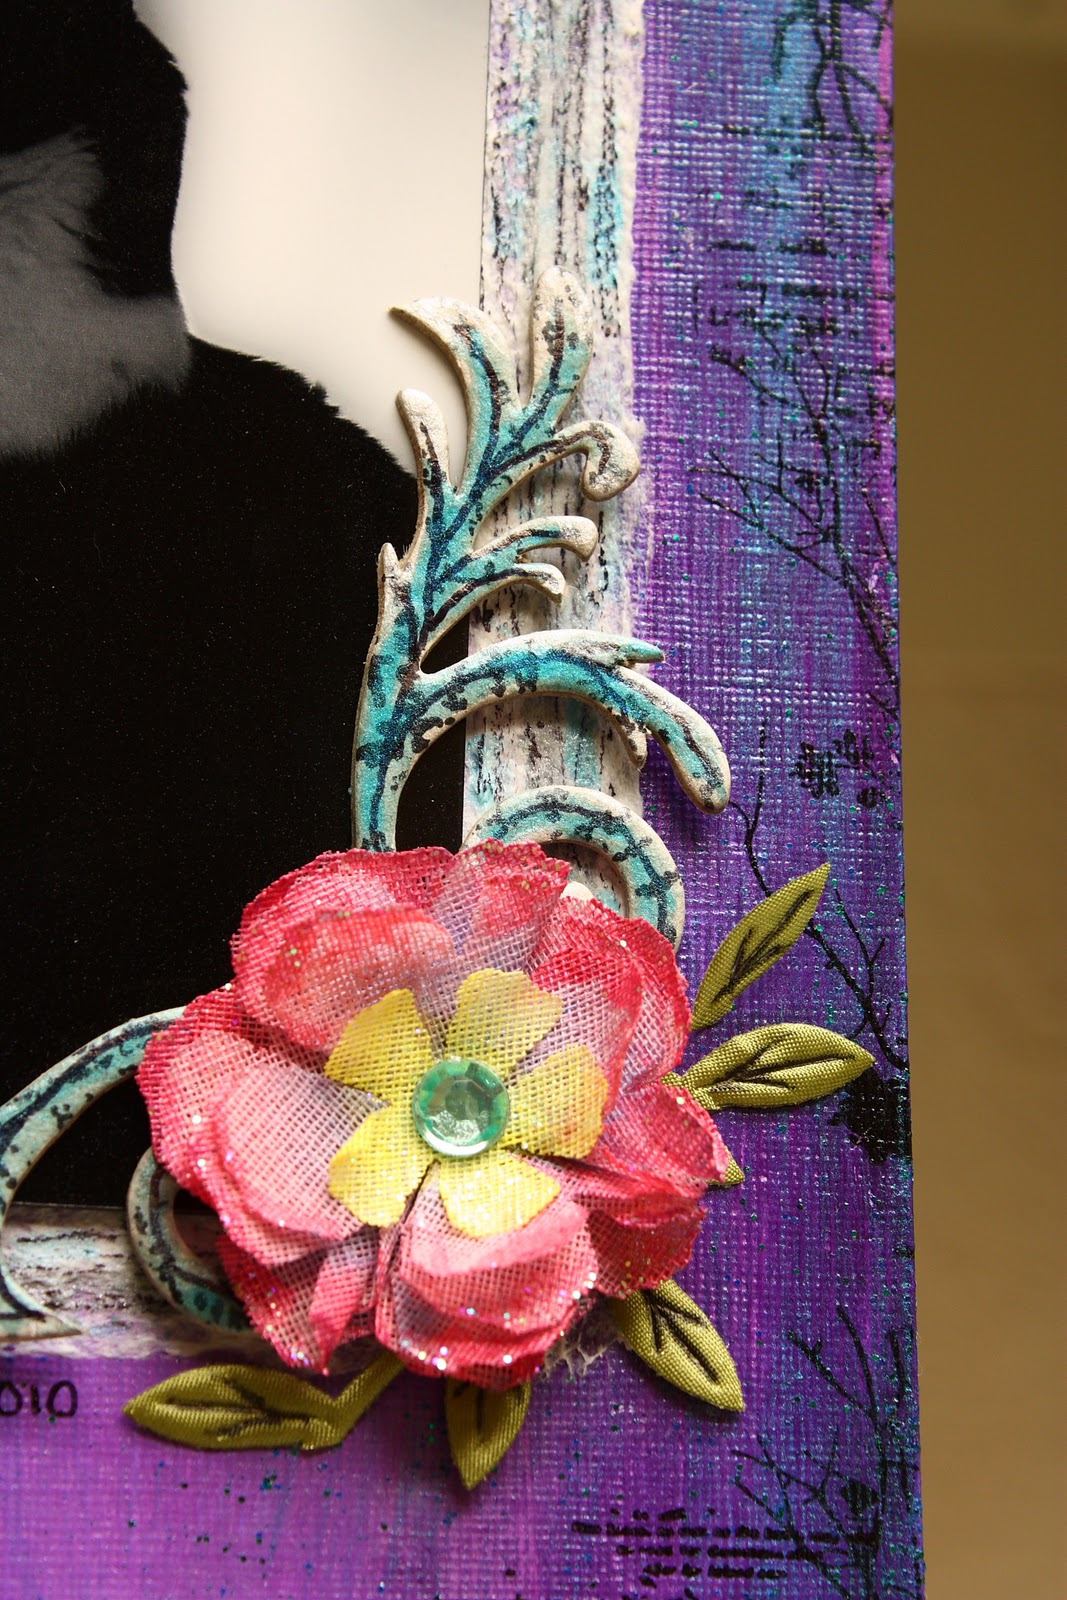 |
| Glam vs Glaze. The teal and chunks of glitter on the background are from the Glam and the teal on the photo frame and flourishes are from the Glaze. |
Supplies used:
- Purple Prism and Alizarin Crimson heavy body acrylics (Liquitex)
- Titanium white heavy body acrylic (Golden)
- Purple studio paint (Claudine Hellmuth for Ranger)
- Mermaid, Luscious Lavender, Chandelier, and Lipstick Pink Glimmer Glam (Tattered Angels)
- Waterfall Glimmer Glaze (Tattered Angels)
- Banana Pudding, Cotton Candy and Peacock Chalkboard Glimmer Mist (Tattered Angels)
- Silver Sugar, Cherry Limeade, Spring Violet, Key Lime Pie and Purple Pansy Glimmer Mist (Tattered Angels)
- Clear stamps (Heidi Swapp for Tattered Angels)
- Teal jewels (Creative Imaginations)
- Vine ribbon (May Arts)
- Black permanent ink (StazOn)
- Black Slick Writer Marker (American Crafts)
- Chipboard flourishes (Maya Road)
- Fiber paste (Golden)
- Water soluble oil pastels (CretaColor Aqua stic)
- Water color pencils (Karat Aquarell Steadtler)
- Tim Holtz Grunge Flower die (Sizzix)
- Olivia font die (Cuttlebug)
- Crinoline fabric
- Water color paper (Strathmore)
- Canvas paper for acrylics (Canson)
- Glossy and Matte Accents (Ranger)
- Fabritac (Beacon)
- Zap dots (Helmar)
Tracy I love this....especially the color because despite the fact that I wear black all the time and adore pink, Purple is my all time favorite color. If you don't win this time I quit...LOL FATABULOUS I LOVE THIS
ReplyDeleteLOL Thanks Cyn!
ReplyDeleteI like how the dark colors really allow the viewer to dive into the picture. There is so much depth it gives the illusion of 3d.
ReplyDeleteLove those flowers! Too awesome!
ReplyDeleteIt looks beautiful love it!!!!
ReplyDeleteHi Tracy I love love love this. Your use of colour is gorgeous and adore the layered flowers. Hmmm not sure if I can get crinoline in New Zealand. Check out my blog if you like, www.artforheart.typepad.com Smiles from NZ
ReplyDeleteThanks! Philippa your work is beautiful! I bet you can find crinoline at your favorite fabric store. ;)
ReplyDeleteGreat job! Congrats on winning.
ReplyDelete